के साथ CATiledLayer में चित्रण I iPhone OS 3.1.3 में एक CATiledLayer का उपयोग करना चाहते हैं और ऐसा करने के लिए -(void)drawLayer:(CALayer *)layer inContext:(CGContext)context में सभी ड्राइंग केवल कोरग्राफिक्स के साथ किया जाना है।कोरग्राफिक्स CGContextDrawImage
अब मैं Flipped की समस्याएं आ iPhone पर समन्वय प्रणाली और वहाँ कुछ सुझाव कैसे रूपांतरण का उपयोग कर इसे ठीक करने के लिए कर रहे हैं:
मेरे समस्या है कि मैं इसे काम करने के लिए नहीं मिल सकता है। मैंने फोटोस्क्रॉलर नमूना कोड का उपयोग शुरू किया और ड्राइंग विधि को केवल कोरग्राफिक्स कॉल के साथ बदल दिया। यह इस
- (void)drawLayer:(CALayer *)layer inContext:(CGContextRef)context {
CGContextSaveGState(context);
CGRect rect = CGContextGetClipBoundingBox(context);
CGFloat scale = CGContextGetCTM(context).a;
CGContextConcatCTM(context, CGAffineTransformMakeTranslation(0.f, rect.size.height));
CGContextConcatCTM(context, CGAffineTransformMakeScale(1.f, -1.f));

CATiledLayer *tiledLayer = (CATiledLayer *)layer;
CGSize tileSize = tiledLayer.tileSize;


tileSize.width /= scale;
tileSize.height /= scale;
// calculate the rows and columns of tiles that intersect the rect we have been asked to draw
int firstCol = floorf(CGRectGetMinX(rect)/tileSize.width);
int lastCol = floorf((CGRectGetMaxX(rect)-1)/tileSize.width);
int firstRow = floorf(CGRectGetMinY(rect)/tileSize.height);
int lastRow = floorf((CGRectGetMaxY(rect)-1)/tileSize.height);
for (int row = firstRow; row <= lastRow; row++) {
    for (int col = firstCol; col <= lastCol; col++) {
    // if (row == 0) continue;
     UIImage *tile = [self tileForScale:scale row:row col:col];
     CGImageRef tileRef = [tile CGImage];
     CGRect tileRect = CGRectMake(tileSize.width * col, tileSize.height * row,
            tileSize.width, tileSize.height);
     // if the tile would stick outside of our bounds, we need to truncate it so as to avoid
     // stretching out the partial tiles at the right and bottom edges
     tileRect = CGRectIntersection(self.bounds, tileRect);
     NSLog(@"row:%d, col:%d, x:%.0f y:%.0f, height:%.0f, width:%.0f", row, col,tileRect.origin.x, tileRect.origin.y, tileRect.size.height, tileRect.size.width);

     //[tile drawInRect:tileRect];
     CGContextDrawImage(context, tileRect, tileRef);
// just to draw the row and column index in the tile and mark the origin of the tile with a red line
     if (self.annotates) {
      CGContextSetStrokeColorWithColor(context, [[UIColor whiteColor]CGColor]);
      CGContextSetLineWidth(context, 6.0/scale);
      CGContextStrokeRect(context, tileRect);
      CGContextSetStrokeColorWithColor(context, [[UIColor redColor]CGColor]);
      CGContextMoveToPoint(context, tileRect.origin.x, tileRect.origin.y);
      CGContextAddLineToPoint(context, tileRect.origin.x+100.f, tileRect.origin.y+100.f);
      CGContextStrokePath(context);
      CGContextSetStrokeColorWithColor(context, [[UIColor redColor]CGColor]);
      CGContextSetFillColorWithColor(context, [[UIColor whiteColor]CGColor]);
      CGContextSelectFont(context, "Courier", 128, kCGEncodingMacRoman);
      CGContextSetTextDrawingMode(context, kCGTextFill);
      CGContextSetShouldAntialias(context, true);
      char text[30];
      int length = sprintf(text,"row:%d col:%d",row,col);
      CGContextSaveGState(context);
      CGContextShowTextAtPoint(context, tileRect.origin.x+110.f,tileRect.origin.y+100.f, text, length);
      CGContextRestoreGState(context);
     }
    }
}

CGContextRestoreGState(context);
}
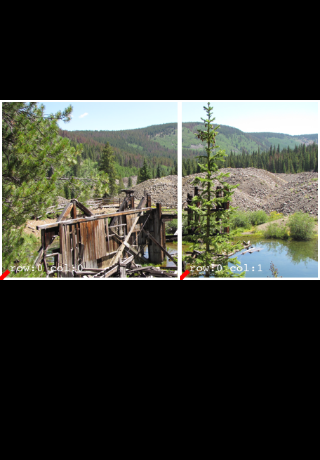
तरह लग रहा है आपको मैं एक स्केल समन्वय प्रणाली को उलटने के लिए परिणत उपयोग कर रहा हूँ और एक अनुवाद निचले बाएं कोने में मूल शिफ्ट करने के लिए बदलने के देख सकते हैं। छवियां सही ढंग से खींची जाती हैं लेकिन केवल टाइल्स की पहली पंक्ति खींची जा रही है। मुझे लगता है कि अनुवाद ऑपरेशन में कोई समस्या है या जिस तरह से टाइल्स के निर्देशांक की गणना की जाती है।
मैं थोड़ा यह सब परिवर्तनों के साथ उलझन में हूँ:
यह है कि यह कैसे लग रहा है की तरह है।
बोनस प्रश्न: कोर ग्राफिक्स में रेटिना डिस्प्ले चित्रों को कैसे संभाला जाएगा?
संपादित करें: यह रेटिना प्रदर्शन मैं सिर्फ नमूना कोड से मूल विधि ले लिया पर काम कर छवियों प्रदान करने के लिए प्राप्त करने के लिए:
- (UIImage *)tileForScale:(CGFloat)scale row:(int)row col:(int)col
{
// we use "imageWithContentsOfFile:" instead of "imageNamed:" here because we don't want UIImage to cache our tiles
NSString *tileName = [NSString stringWithFormat:@"%@_%d_%d_%d", imageName, (int)(scale * 1000), col, row];
NSString *path = [[NSBundle mainBundle] pathForResource:tileName ofType:@"png"];
UIImage *image = [UIImage imageWithContentsOfFile:path];
return image;
}
सिद्धांत रूप में प्रदर्शन के पैमाने कोर के बाद से नजरअंदाज कर दिया है ग्राफिक्स पिक्सल पर काम नहीं कर रहा है, इसलिए जब अधिक पिक्सल खींचने के लिए कहा जाता है, तो स्क्रीन को भरने के लिए अधिक कैटिल्डलेयर (या सब्लेयर) का उपयोग किया जाता है। बहुत
धन्यवाद थॉमस
आपके उत्तर के लिए धन्यवाद। यूआईएममेज विधि को सही रिज़ॉल्यूशन प्राप्त करने के रूप में रेटिना डिस्प्ले के लिए सही छवि प्राप्त करने के लिए कोई भी [[UIImage imageNamed: @ "imageName"] CGImage] विधि का उपयोग नहीं कर सकता है? – GorillaPatch
यह वास्तव में अच्छी तरह से काम करता है! धन्यवाद! मैं मूल रूप से छवि टाइल्स प्रदान करने के लिए नमूना कोड से ली गई विधि का उपयोग करता हूं, इसलिए रेटिना डिस्प्ले पर यह छवि को आकर्षित करने के लिए एक अलग ज़ूमस्केल पर अधिक टाइल्स प्रदर्शित करता है। मैंने मूल प्रश्न के लिए विधि जोड़ा। – GorillaPatch